Monday 28 October 2013

How to Check Who is Accessing Your Wifi ???


How to Check Who is Accessing Your Wifi ???

Let's check who is accessing your WiFi or wireless connection using a Small application called
Wireless Network Watcher v1.55 . It is a Freeware Software.

About Wireless Network Watcher

Wireless Network Watcher is a small utility that scans your wireless network and displays the list of all computers and devices that are currently connected to your network.

For every computer or device that is connected to your network, thefollowing information is displayed: IP address, MAC address, the company that manufactured the network card, and optionally the computer name.

You can also export the connected devices list into html/xml/csv/text file, or copy the list to the clipboard and then paste into Excel or other spreadsheet application.

System Requirements

* This utility works on Windows 2000, Windows XP, Windows Server
2003/2008, Windows Vista, and Windows 7.
* This utility can only scan a wireless network that you're currently connected.

You can Download Wireless Network Watcher by Clicking Download Button Below .

Important Hidden Secret Codes / Shortcuts in Google Chrome


Important Hidden Secret Codes / Shortcuts in Google Chrome

We all know that Google Chrome is the World’s Most Popular Internet Browser now a days. It has replaced Internet Explorer and Beaten the Mozilla Firefox from the Most Used Internet Browser.


Now Can I ask you a Question ? How Many of you know the fact that Google chrome possesses some secrets that no one can observe directly or identify easily ?

These shortcuts or codes can be used to change special settings on chrome just by typing them on the Address Bar . Now Let’s familiarize with the important codes among them.

1.Chrome://help – To Check Browser Version and for Updating Browser.

2.Chrome://extensions – Easily displays whole add-on

3.Chrome://downloads – Shows your Downloads

4.Chrome://history – Your Browsing History

5.Chrome://Settings – Opens your Settings Page

6.Chrome://Settings/search engine – For Adding/Removing Search Engines

7.Chrome://Settings/import Data – For Importing your Settings and Bookmarks

8.Chrome://Settings/manage profile – To Mange your Profile Picture and User

9.Chrome://Settings/Content – To chane Content Settings.

10.Chrome://Settings/clearBrowserData – For Easily Deleting Browsing data and History

11.Chrome://Settings/contentexceptions#Cookies – Mange your Cookies.

12.Chrome://Settings/content Exceptions#images – Mange Picture Settings on Certain Sites.

13.Chrome://Settings/content Exceptions#javascript – Helps to Control Java scripts

14.Chrome://Settings/content Exceptions#plugins – To Manage Plugins

15.Chrome://Settings/content Exceptions#pepper-flash-cameramic – For Enabling / Disabling the settings of Microphone and Webcam


join us "we will help you with our best effort " & share

How to Remove the SVCHOST.exe Virus


How to Remove the SVCHOST.exe Virus


Svchost.exe is the name of a generic host process for services that run from dynamic link libraries (DLLs).

The original file is located in the C:\Windows\System folder and it checks the services portion of the Windows registry to verify and list the services that must load on system begin up.

Multiple sessions of the file typically run while a system is operational, each session containing a separate group of services.

A variety of malware spreading endless file of the same name - scvhost.exe over internet especially via Yahoo Messenger the etc. which block Task Manager ,Registry Editor and the use of command prompt.

Take a Look at the screenshots on how they causes headaches for you.


These Errors mess up whole your works and files and cause you lose of time


Now let's take a look on how to remove the Virus from our PC.


Steps to Get rid of It


*-If the operating system of the infected computer is either Windows Me or Windows XP, turn off System Restore while this repair is being implemented.

*-To turn off System Restore within Windows Me, click Start > Settings > Control Panel. Double-click "System." Select "File System" from the Performance tab. Left click the "Troubleshooting" tab and check the "Disable System Restore" crate. Click "OK."

*-To turn off System Restore within Windows XP, log in as Administrator and click "Start." Right click "My Computer" and choose "Properties" from the shortcut menu. Check the "Turn off System Restore" option for each drive on the System Restore tab. Left click "Apply" and "Yes" to confirm when prompted. Click "OK.

*-Restart your computer in Safe Mode and log in as Administrator. Press "F8" after the first beep occurs during start up, before the display of the Microsoft Windows logo. Select the first option, to run Windows in Safe Mode from the selection menu .
*-Access the command prompt. Click Start > Run. Type "cmd." Click OK > CD (change directory) from the command prompt, press the space bar.

*-Type the name of the full directory path of the folder containing your Windows system files. It will be either "C:\Windows\System" or "C:\Windows\System 32."
From the command prompt, type the following to unprotect the files for removal:

*-"attrib -h -r -s scvhost.exe" and press "Enter;"

*-"attrib -h -r -s blastclnnn.exe" and press "Enter;"

*-"attrib -h -r -s autorun.inf" and press "Enter."
Delete the files by typing the following from the command prompt:

*-"del scvhost.exe" and press "Enter;"

*-"del blastclnnn.exe" and press "Enter;"

*-"del autorun.ini" and press "Enter."
Type "cd\" to return to the main Windows directory.

*-Unprotect and delete the Autorun.inf file by typing the following from the Windows directory command prompt:

*-"attrib -h -r -s autorun.inf" and press "Enter;"

*-"del "autorun.inf" and press "Enter;"

*-Type "regedit" and press "Enter" to open the Registry Editor.
Locate the following entry:

*-HKEY_CURRENT_USER\Software\Microsoft\Windows\CurrentVersion\Run.

*-Delete the incorrectly spelled Yahoo! Messenger entry with the value

*-"c:\windows\system32\scvhost.exe."
Locate the following key:

*-HKEY_LOCAL_MACHINE\SOFTWARE\Microsoft\Windows NT\CurrentVersion\Winlogon.

*-Within the key, there is a "shell" entry with the value of "explorer.exe, scvhost.exe". Edit the entry to remove the reference to Scvhost.exe, leaving Explorer.exe as the remaining value in the registry entry.
Locate the following key:

*-HKEY_LOCAL_MACHINE>SYSTEM>CurrentControlSet>Services>

*-Delete the following subkeys from the left panel:

*-RpcPatch

*-RpcTftpd

*-Exit the command prompt and return to the operating system. Type "Exit," and press "Enter."

*-Reboot the PC.

*-If Scvhost.exe still resides on the computer, repeat these steps

*-Try using an automatic removal program like Avast Antivirus or McAfee or Symantec .


join us on facebook , "we will help you with our best effort" All Time Solutions.

PREDATOR - Lock Down Your PC With Your USB Flash Drive


PREDATOR - Lock Down Your PC With Your USB Flash Drive

Lock your Computer Using USB drive


Today Let's Learn , How to Lock down your PC using your USB drive. You can use Pen drive ,Memory card or any other USB device to lock your Computer. This is possible by using a freeware software called Predator. Predator, a tiny Windows application which makes your USB flash drive more effective and interesting. Using Predator and your USB flash drive you can lock your PC/Laptop.The PC will automatically locked down when you remove the flash drive from it even if you windows session will still running.

How to install Predator in your computer

1.Download Predator free edition (Download link's are provided at the bottom) and Install it in your PC.

2.After installing run the application from Windows program menu or the desktop shortcut icon.

3.You will get a message box like this


*-Insert your USB flash drive and click OK to continue.

*-Now the preference window will appear.

*-Here you can set the screen darkness,startup mode,and other options by checking in the checkboxes.

*-In the Change Password field put your new password when you are configuring 1st time.

*-Select the Drive letter in your computer which indicates the USB drive of your computer.

*-Now press “Create Key” button and it will successfully create the key file in your USB flash drive.

*-Now click OK.

Check in the system tray.If the Predator icon is blinking then everything you have done is OK an ready to lock your PC


How does it work

1.Predator locks your Pc when you remove your USB flash drive even if your widows session is still running.It will darken your screen and the key board and mouse will become inactive.

2.When you return back then just insert your USB flash drive and the windows will be automatically unlocked.

3.If any body try to access your computer in your absence then you can see there activity in the log file.You can set the alarm so that it will sound a noise if any body try to access your computer when it is locked.

4.Predator use the USB drive as an access control device.It does not perform any type of modification in the existing data in you flash drive.

5.Predator changes the security codes record in your flash drive frequently.If any intruder copies your USB security stick it will not work because in the same time the code of your own stick will change itself automatically.

5.The Task Manager is disabled by Predator when you remove the USB flash drive.So any body can’t terminate any process in your Windows pressing Alt+Ctrl+Del.

6.If you have lost your USB drive then you can unlock your PC with the password you set in the time of starting the software first time.

7.If want to replicate the logs with your twitter account then you have to allow on your PC to remotely monitor all access-control activity.


Download Predator Free Edition for 32-bit Windows

This package installs PREDATOR on 32-bit based Windows systems:
Windows 7 (all editions)
Windows Vista (all editions)
Windows Server 2008
Windows Server 2003
Windows XP SP3 (all editions)


Download Predator Free Edition for 64-bit Windows

This package installs PREDATOR on 64-bit based Windows systems:
Windows 7 (all editions) 64-bit
Windows Vista (all editions) 64-bit
Windows Server 2008 x64
Windows Server 2003 x64


If you face any problem then please contact with us leaving you comment in the comment section.

join us on facebook All Time Solutions.


Recover Lost Files in Hard Disk, Memory Card and USB Drive


Recover Lost Files in Hard Disk, Memory Card and USB Drive

What if you have formatted your USB Drive?
Or you have
deleted an important file from your system of Pen drive?
You can still recover these deleted files. There is a nice
windows tool which is available for free. This tool
is DiskDigger which is able to recover all type of lost
documents and files.


DiskDigger is able to recover files from FAT (FAT12,
FAT16, FAT32), NTFS, and exFAT partitions.
Download this tool and run in your system. You will see
the list of drives available in the system. Select the drive
from which you want to recover files. Then click on and
next to start recovery process.
While recovering files, you can pause or stop the
process at anytime. To recover the file, click on Save.
But there is no option to recover all files at once. You
need to recover files one by one.


join us on facebook for more update All Time Solutions.

Saturday 26 October 2013

How to Tell If Your Computer is Overheating and What to Do About It


How to Tell If Your Computer is Overheating and What to Do About It


Heat is a computer’s enemy. Computers are designed with heat dispersion and ventilation in mind so they don’t overheat. If too much heat builds up, your computer may become unstable or suddenly shut down.

The CPU and graphics card produce much more heat when running demanding applications. If there’s a problem with your computer’s cooling system, an excess of heat could even physically damage its components.

Is Your Computer Overheating?
When using a typical computer in a typical way, you shouldn’t have to worry about overheating at all. However, if you’re encountering system instability issues like abrupt shut downs, blue screens, and freezes — especially while doing something demanding like playing PC games or encoding video — your computer may be overheating.

This can happen for several reasons. Your computer’s case may be full of dust, a fan may have failed, something may be blocking your computer’s vents, or you may have a compact laptop that was never designed to run at maximum performance for hours on end.

Monitoring Your Computer’s Temperature
First, bear in mind that different CPUs and GPUs (graphics cards) have different optimal temperature ranges. Before getting too worried about a temperature, be sure to check your computer’s documentation — or its CPU or graphics card specifications — and ensure you know the temperature ranges your hardware can handle.

You can monitor your computer’s temperatures in a variety of different ways. First, you may have a way to monitor temperature that is already built into your system. You can often view temperature values in your computer’s BIOS or UEFI settings screen. This allows you to quickly see your computer’s temperature if Windows freezes or blue screens on you — just boot the computer, enter the BIOS or UEFI screen, and check the temperatures displayed there. Note that not all BIOSes or UEFI screens will display this information, but it is very common.


There are also programs that will display your computer’s temperature. Such programs just read the sensors inside your computer and show you the temperature value they report, so there are a wide variety of tools you can use for this, from the simple Speccy system information utility to an advanced tool like SpeedFan. HWMonitor also offer this feature, displaying a wide variety of sensor information.

Be sure to look at your CPU and graphics card temperatures. You can also find other temperatures, such as the temperature of your hard drive, but these components will generally only overheat if it becomes extremely hot in the computer’s case. They shouldn’t generate too much heat on their own.

If you think your computer may be overheating, don’t just glance as these sensors once and ignore them. Do something demanding with your computer, such as running a CPU burn-in test with Prime 95, playing a PC game, or running a graphical benchmark. Monitor the computer’s temperature while you do this, even checking a few hours later — does any component overheat after you push it hard for a while?

Preventing Your Computer From Overheating
If your computer is overheating, here are some things you can do about it:

1.Dust Out Your Computer’s Case: Dust accumulates in desktop PC cases and even laptops over time, clogging fans and blocking air flow. This dust can cause ventilation problems, trapping heat and preventing your PC from cooling itself properly. Be sure to clean your computer’s case occasionally to prevent dust build-up. Unfortunately, it’s often more difficult to dust out overheating laptops.

2.Ensure Proper Ventilation: Put the computer in a location where it can properly ventilate itself. If it’s a desktop, don’t push the case up against a wall so that the computer’s vents become blocked or leave it near a radiator or heating vent. If it’s a laptop, be careful to not block its air vents, particularly when doing something demanding. For example, putting a laptop down on a mattress, allowing it to sink in, and leaving it there can lead to overheating — especially if the laptop is doing something demanding and generating heat it can’t get rid of.
3.Check if Fans Are Running: If you’re not sure why your computer started overheating, open its case and check that all the fans are running. It’s possible that a CPU, graphics card, or case fan failed or became unplugged, reducing air flow.
4.Tune Up Heat Sinks: If your CPU is overheating, its heat sink may not be seated correctly or its thermal paste may be old. You may need to remove the heat sink and re-apply new thermal paste before reseating the heat sink properly. This tip applies more to tweakers, overclockers, and people who build their own PCs, especially if they may have made a mistake when originally applying the thermal paste.


his is often much more difficult when it comes to laptops, which generally aren’t designed to be user-serviceable. That can lead to trouble if the laptop becomes filled with dust and needs to be cleaned out, especially if the laptop was never designed to be opened by users at all. Consult our guide to diagnosing and fixing an overheating laptop for help with cooling down a hot laptop.


join us for this page update All time solutions.

Run Commands in the Windows Explorer Address Bar


Stupid Tricks: Run Commands in the Windows Explorer Address Bar

Here’s a fun little tip for you: did you know that you can run commands from the address bar in Windows Explorer? It’s true — any app that you could run on the command line can be run from the address bar, including opening a new command prompt.

For instance, if you were to type cmd into the address bar, you would end up opening a command prompt with the current path already set to whatever the current folder is. Useful.


You can also run other commands, like opening a file in the current folder with Notepad. Imagine that you have a file on your desktop called test.txt and you want to open it. From the Desktop folder in Explorer, type notepad test.txt into the address bar, and hit the enter key.


ust like that, Notepad will open the file. Easy!

You could also use other commands directly from the address bar — for instance, if you wanted to see a directory listing of the current directory in the command prompt, you could use cmd /k dir in the address bar. Obviously that would be silly, but you can do it.

for more update join us on facebook All Time Solutions

Wednesday 23 October 2013

Building a New Computer – 5: Tweaking Your New Computer


Building a New Computer – Part 5: Tweaking Your New Computer

Now that we’ve put our computer together, setup the BIOS, and installed Windows, it’s time to get down to the business of tweaking our new computer. In the final installment of this series, I’m going to cover the basic configuration and software tweaks that you should use to keep your computer safe, secure, and running at peak performance, and a few tweaks to make Vista easier to use.

Note that no configuration is right for everybody, these are general rules that will help you.

Keep Your Computer Patched and Protected


If you’ve ever had to deal with your computer being infected with spyware or viruses, you know that keeping your computer protected is of immense importance. There’s a couple of quick steps you can do to keep the hackers out and your data safe:

1. Always use a Firewall – You don’t have to buy any fancy firewall software unless you want to, the built-in Firewall in Windows will work just fine… as long as you make sure it’s enabled.
2. Keep Your System Patched – I’d recommend that you leave Windows Update set to update automatically, so you don’t have to think about whether you have the latest patches installed.
3. Keep Your Anti-Virus / Anti-Spyware Up to Date – What’s the point of using a malware protection package if you aren’t going to keep it up to date? For instance, if your trial version of some non-free package runs out, you are a lot less secure than if you simply used AVG Free with automatic updates enabled.

Windows Vista includes the Windows Security Center, which will tell you at a very quick glance how protected you are. You’ll notice in the screenshot below that Windows detected that my Anti-Virus is turned off.


A quick setting change in the AVG panel, and now everything is enabled, and you’ll notice the Update Manager component is active, so I’m receiving the latest updates as well.


If you want a more powerful solution, however, you should run the excellent CCleaner utility once every week or two, as it will clean out temporary files from not just Windows applications, but also Firefox and many other sources of file bloat.


Important Note: CCleaner comes bundled with the Yahoo! toolbar, which you should make sure to uncheck during the installation. (screenshot from Mysticgeek’s article on the subject)


Defragment Your Hard Drive Regularly

Over time, your hard drive builds up so many files that they end up becoming fragmented across your drive. This can happen because applications create temporary files, which then get deleted, leaving little chunks of free space everywhere. When new files are written, they end up needing to be split up into smaller chunks in order to fill in those small chunks of free space… which leads to a really disorganized hard drive. This is the reason why you defragment your drive, which re-organizes the files so that they are each in their own place.

Windows Vista has completely automatic defragmentation of your drives, and there’s really no need to mess with it. If you would like to, then we’ve got an article on the subject: Set Automatic Defrag Options for All Drives in Vista Service Pack 1

If you want to manually defragment your drive, you can add an option to defrag to the right-click menu for your drive, or you can even create a batch file to defragment multiple drives at once.

Note: There are plenty of third party defrag tools that most likely do a much better job, but they always cost money. More on this in a future article.

Backup Your Computer

Backing up your data is so important that I’m planning on writing a series to discuss it in more depth, but at the very least you should use the backup utility bundled in Windows Vista to back up your files to an external drive, and make sure to set the backup to run on a schedule. If you have the Ultimate version of Vista you’ll also have access to the “Complete PC Backup” feature, which will create an image of your hard drive. If you are using a Home version, you can check out Mysticgeek’s guide to using the freeware DriveImage XML application for the same purpose.

You could alternatively use the free 2GB Mozy online backup to keep an off-site backup of your most critical data. You can also pay a few bucks a month for unlimited storage if you like, but I would use online backup as a supplement to local backup, not as a total replacement.

I’d recommend checking out Lifehacker’s recent roundup of backup utilities, which also includes the one that I use, SyncBack SE. It’s an incredibly powerful application, although to get access to all the features you need to pay a few bucks. Well worth it for the peace of mind of knowing my data is safe.

Customizing the Look & Feel


Now that we are all safe and secure, it’s time to start customizing the user interface. Almost anything in Windows can be customized if you don’t mind spending a little time tweaking.

I’m just going to list out the tweaks that I usually apply to a new machine, you can decide which ones are right for you. The one I simply can’t live without is increasing the size of the taskbar previews, cause the tiny default size just drives me crazy.


Customize Your Windows Vista Logon Screen
Disable Shortcut Icon Arrow Overlay in Windows Vista
How to Patch Windows Vista to Enable Custom Themes (Visual Styles)
Increase Size of Windows Vista Taskbar Previews
Hide Desktop Icon Text on Windows Vista
Hide the Recycle Bin Icon Text on Windows Vista
Make New Folders in Your Vista User Directory Use Matching Greenish Icons
Disable Flip3D in Windows Vista
Great Expose Clone for Windows Vista

Add Shortcut Icons for Common Tasks

I like to add a bunch of useful shortcut icons to my Quick Launch bar for common tasks. Many of these I also place in my start menu so that I can use the hotkey features built into Windows.

These are just a few of the shortcuts that you can create… it’s really a matter of personal choice. My personal favorite is being able to turn the desktop icons on or off.

Quick Tip: Create Shutdown / Restart / Lock Icons in Windows Vista
Create a Shortcut or Hotkey to Turn the Desktop Icons On or Off
Create Icons to Start the Screensaver on Windows Vista
Create Shortcut Icon to Disable / Enable the Screensaver
Display My Computer Icon on the Desktop in Windows Vista
Create a Shortcut Icon or Hotkey to Turn Windows Vista Firewall On or Off
Create a Shortcut or Hotkey for the Safely Remove Hardware Dialog
Create a Shortcut or Hotkey to Clear the Clipboard in Windows Vista
Create a Shortcut or Hotkey to Eject the CD/DVD Drive
Create a Shortcut or Hotkey to Immediately Eject a Specific USB Drive
Create a Shortcut or Hotkey to Open Task Manager’s “All Users” View in Windows Vista

Power Up Your Context Menu

The context menu can be a powerful tool, giving you options specifically for a file type, or even allowing you to add an Open with Notepad to all files, which is probably one of the most useful additions you could choose.

Because I do a lot of tweaking, I also find adding “Take Ownership” to the menu to be another indispensable option that I couldn’t live without. As for the rest, it’s a matter of preference.

Add Copy To / Move To on Windows Vista Right-Click Menu
Add Encrypt / Decrypt Options to Windows Vista Right-Click Menu
Add Disk Cleanup to the Right-Click Menu for a Drive
Create a Context Menu Item to Copy a List of Files to the Clipboard in Windows Vista
Create a Context Menu Item to Copy a Text File To the Clipboard in Windows Vista
Customize the Windows Vista Send To Menu
Restore the “Search…” Item to the Folder Context Menu in Windows Vista SP1
Add “Take Ownership” to Explorer Right-Click Menu in Vista
Add “Open with Notepad” to the Context Menu for All Files

Fix Some Vista Annoyances

The next stop is a couple of tweaks to severely reduce some of the annoyances in Windows Vista. Even though I wouldn’t choose a different operating system, there’s still a few things that grate on my nerves… but thankfully there are always workarounds.

Here’s a couple of annoyances that you can quickly fix…

Disable Caps Lock Key in Windows Vista
4 Ways to Make UAC Less Annoying on Windows Vista
Turn Off Windows Explorer Click Sounds in Windows Vista
Make Windows Vista Log On Automatically
Make Trillian on Vista Open Links in Firefox
Temporarily Disable Windows Update’s Automatic Reboot in Vista
Prevent Windows Update from Forcibly Rebooting Your Computer
Change the Windows Vista Power Buttons to Shut Down

For more on this topic, you can read my guest article on Lifehacker:

How to Make Windows Vista Less Annoying

Install Your Software

Now that we’ve patched, secured, tweaked and hacked our system, it’s time to start installing software so that we can actually use the computer for something useful. There’s no right configuration of software for everybody… if you like Internet Explorer better than Firefox, that’s your decision and there’s nothing wrong with it. I’d still recommend giving Firefox a try, but it’s really up to you.

Many people have asked me what software I personally use, so here’s a quick list of the mainstream software that I use, some of which is not free, and much of which won’t apply to you.

Firefox for web browsing, although I’ll admit that I often use both IE and Opera both for testing and because they start up a lot quicker.
Pidgin for instant messenger, because it works cross-platform and supports a dozen services so I can use all my accounts in one application.
CCleaner for cleaning up my system.
AVG Free for anti-virus.
AutoHotkey for incredibly powerful hotkey scripting.
Microsoft Outlook with Gmail IMAP for email. If you want to do the same, we’ve got a guide on that.
Microsoft’s Live Mesh for remote desktop and file sharing between my home and office.
Synergy for sharing the mouse and keyboard across my Vista and Linux computers on my desk. We’ve previously covered how to resolve issues using it under Vista.
Texter for setting up text substitution and automated form filling.
SftpDrive for mapping a drive letter to the How-To Geek server over SSH. (Not free or cheap, but worth it) Note that you could alternatively use the free WinSCP, but it doesn’t create a drive letter.
SecureCRT for SSH connections to the How-To Geek Server. (Expensive, but very powerful)
Tudumo for my Todo list… it’s a great little application with very powerful hotkey support.
Google Calendar Sync to synchronize my Outlook and Google Calendar.
SyncBack SE for backups… I love this software, it’s absurdly powerful.

I use a ton of other software, but most of it would only be useful for programmers so I won’t bother listing those here.


For those of you that missed the rest of the series, here you go:

for update join on All Time Solutions

1.Building a New Computer :- 1: Choosing Hardware

2.Building a New Computer – 2: Putting it Together

3.Building a New Computer – 3: Setting it Up

4.Building a New Computer – 4: Installing Windows and Loading Drivers

5.Building a New Computer – 5: Tweaking Your New Computer


Building a New Computer – 4: Installing Windows and Loading Drivers


Building a New Computer – Part 4: Installing Windows and Loading Drivers

now this windows 7 & windows 8 / 8.1 time but for simplification i pefer you
start 1st with windows xp / vista


Now that we’ve put the computer together and setup the BIOS options, we need to get down to business: Installing the operating system. For the purposes of this article we’ll be focusing on Windows Vista, but we’ll try and briefly cover XP as well.

What You Need to Know Before Installing

It’s very important to stop and read these items, even if you don’t read the rest:

1. If you are going to be dual-booting Windows XP and Windows Vista, you should always install XP first, then Vista.
2.In a dual-boot scenario, make sure that you leave plenty of room for either operating system. Don’t try to get away with a tiny partition for one operating system just because you think you won’t use it as much. Also, buy a big hard drive, they are cheap.
3. Windows XP does not have SATA drivers included. You’ll either need to create a slipstreamed install cd, or set SATA to IDE mode in the BIOS.
4. If you want to use Linux instead, then great… unfortunately there are too many varieties to cover them here. I recommend Ubuntu, and for installation support you should check out the Ubuntu Forums.

Installing Windows Vista

I’m not going to cover every single step of installing Windows, but I would like to highlight a couple of very important options during the setup that can make a big difference. For the most part, installing Vista is a simple and easy task.

Step 1: Put the install disc in the drive, and boot up the computer:

You may or may not get this next screen, depending on your install disc. If you do, make sure that you select the version of Windows that you purchased, cause otherwise you’ll have to reinstall later. (I’m not sure that retail editions show this screen, and I’m using an MSDN copy)

You’ll be prompted to select whether you want to do an Upgrade or Custom install. If you selected an Upgrade edition, you’ll need to have a previous version of Windows. My install disc only allows for a clean install, so there’s not really a choice for me anyway.

Now comes the most important screen…. where do you want to install Windows? If you have previously installed XP, you will need to create a new partition in the space that you left open for Vista, which should say “Unallocated Space”. (Whatever you do, install XP first in a dual-boot scenario)

You should be done with the install options at this point, and you’ll see the install screen…

Your computer should reboot and you’ll have to go through a couple of simple screens to create a user account, none of which are difficult. The interesting part comes later, when we need to start getting all the drivers updated and tweaked.

Installing Windows XP


If you are going to install XP in a dual-boot scenario, you should absolutely install XP first so you don’t have to deal with the Vista boot loader being wiped out if you install XP second. I’m not going to go through the entire installation, but here’s the highlights.

Here’s what you need to know:

1. Windows XP does not have SATA drivers included.
2. You’ll either need to create a slipstreamed install cd, or set SATA to IDE mode in the BIOS.
3. It’s very unlikely that your graphics card or network card will work until you load the drivers. You could include those in the slipstream cd if you like.

Once you get to the screen where you can choose the partition, you have a couple of options. If you want to only install XP, you could just hit the Enter key and be done with it. If you are planning on doing a dual boot, however, you need to use “C” to create a new partition.

Note: If you get the message “Setup did not find any hard disk drives”, then you need to create a slipstreamed install cd.

Choose the size for the partition, and I recommend leaving plenty of space for both Vista and XP. There’s nothing more annoying than running out of space on one of the partitions in a dual boot.

You could create a second partition at this point if you want, or just install on the new C: partition.

The rest of the install is more or less painless, and since XP has been around for nearly a decade I’m sure you are familiar with it, but here’s your next steps:

1.Install the Network Card Drivers (usually from the motherboard driver cd)
2.Install the Graphics Card Drivers
3.Install the rest of the drivers (motherboard, sound, etc)
Use Windows Update to patch the system. (Make sure you are patched through SP2 at least)

After Vista is Installed: Updates!

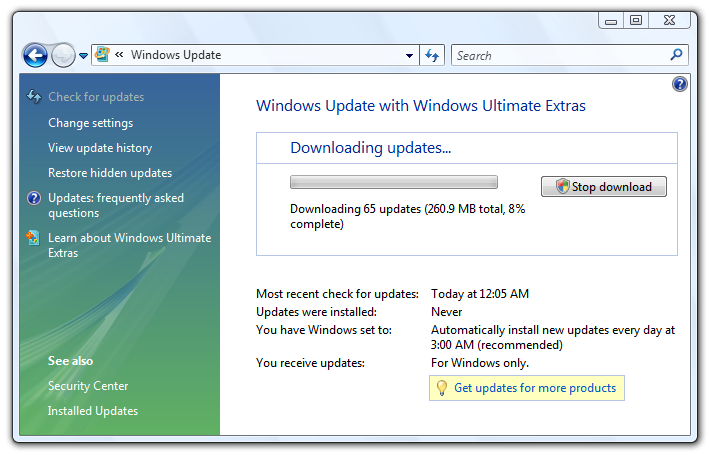
Now that you have Vista successfully installed, the first thing you should do is use Windows Update to get your system completely patched. This process will take… a long while. The annoying thing is that you’ll need to run Windows Update a bunch of times… that “Check for Updates” link is your friend. (Sometimes it will return with no updates, but if you check again they’ll show up.)


I would advise updating your system all the way through Service Pack 1 before you do anything else. It might take a lot of updates and a number of reboots to get to that point, but it will be worth it.

Note: if you don’t have internet access at this point, you need to install the network card drivers from the motherboard drivers disc.

Updating Your Drivers


Having a system that works well depends greatly on the drivers, which are the pieces of software that tells the hardware what to do. If the driver you are using has a flaw in it… bad things are going to happen. That’s why it’s important to use updated drivers.

You will also get the best performance out of your video card by using the drivers provided by the manufacturer rather than the built-in Vista drivers.

What you need to know:

1.The cd that comes with your motherboard likely has driver versions that are already old. If you can get online with the built-in Vista drivers, just put that cd to the side.
2. You should always grab the latest drivers from the manufacturer’s site for at least your motherboard chipset, video card, sound card and network card. Even better, get updates for all of them.

The first thing you can do is open up Device Manager through the start menu search box, and look for any items with question marks or exclamation points next to them. You’ll notice in the screenshot below that there’s an “Other devices” section with “Unknown device” in it, because I haven’t loaded the chipset drivers yet. If you look even closer you’ll see that the video card driver is the default Microsoft version, which is significantly slower than the latest manufacturer one.

Here’s a couple of download links to get you started, but depending on your system you might need to do some research. For instance, if your motherboard has integrated sound, you will need to head to the manufacturer’s site to get the latest driver for that.

Motherboard Chipset Drivers

* NVIDIA
* Intel

Graphics Drivers

* NVIDIA
* ATI
* Intel

Usually the chipset drivers have a simple installer that handles it all for you, no need to do the right-click and update thing in Device Manager.

The graphics card drivers usually work very similarly, you can just run through a quick wizard and be done with it, after the obligatory 49th reboot or so.

Once you’ve installed the various drivers, you should be able to open up Device Manager and see that all the devices are functioning properly… no exclamation points or unknown devices, and you’ll notice my NVIDIA driver has been updated:

You can verify the version that you’ve installed for a component by going into the properties \ Drivers tab.

Note: I had lots of problems with this particular NVIDIA card under 64-bit Vista, so I switched it out with an 8800 GS during the middle of the build. Another reason why running benchmarks is useful (detailed below)

If you click the Update Driver button, you can either let Windows search for updated drivers (although this happens with Windows Update)…

Or you can choose the driver manually by clicking “Browse my computer for driver software”. On this screen you can either choose a location, such as the folder you extracted some drivers to, or you can pick from the list of installed drivers.

On this screen you can choose the actual version if there are multiple drivers installed (or you could use the Roll Back Driver button you might have noticed on the driver details screen).

For the most part, you can simply install the latest drivers and Vista should have no problems detecting and using the devices. If you have a problem, then try updating or rolling back.

Note: The only exception I’ve found to the “no fuss” rule is that NVIDIA drivers are just awful, especially under 64-bit Vista. They install easy enough, but they also crash really easily too.

Using Burn-In and Testing Tools

Now that we have all the drivers loaded, it’s time to give the machine some tests, to make sure everything is working properly… and also because you likely want to show off your Windows Experience Score, which we’ll start off with.

Open up Control Panel and navigate down to System and then “Check your computer’s Windows Experience Index base score”

At this point you are thinking… but it has a score, didn’t the installation do that for me? You’d be right, but that was before you loaded all the drivers… just click on the score:

And you’ll likely see “New hardware detected”, so you’ll need to click the Refresh Now button, which will immediately start running the tests (you should close other applications before doing this)

If you have a problem during this very simple test, then there’s probably something wrong with your drivers or hardware. If it all runs successfully, you’ll see your new score, which may or may not be better than the first one.

Note: You’ll notice my memory score increased quite a bit… this is because when running the first test I had installed the memory in single channel mode since I was waiting for the other two pieces. Make sure to read your manual when installing the memory.

Next, we’ll move on to some better benchmark tools… there are a lot of them out there, but some of the standards are the Futuremark tests with their two well-known utilities:

* 3DMark06
* PCMark05

When you download these utilities, you’ll be prompted a few times to purchase it, which will give you additional tests. If you simply want to run a regular benchmark for free, you can wait a few seconds for the Continue button to become active.

Once there, you can run the benchmarks and see how your system performed.


Unfortunately the free version doesn’t give you much else besides a score via their website, and in my case it didn’t give me a very useful comparison, since the machine they compared it to was a quad core overclocked to 5GHz:

The real point of running these tests is to make sure your system can handle a load without dying. In my case, my machine locked up during the initial run because the old video card I started out with had serious video card/driver problems, so I replaced the video card with a better one and was able to successfully run the test.

Run a CPU Stress Test to Check Temperatures

If you got through the PCMark test, your system is no doubt running perfectly fine. This test is just to make sure that your processor isn’t going to overheat if you are maxing it out for a long time.

There’s a couple of tools you can use to max out the CPU, but the simplest one is called Max CPU by Kenny Kerr. All you have to do is move the slider to the number of CPUs you want to max out.

If you open up Task Manager and Core Temp at the same time, you can see that all the CPUs are running at 100%, and the cores are only running at 55 degrees or less, even after a couple of minutes.

If your temperatures are way out of range, you know that you either didn’t install the CPU cooler correctly, or you need to get a better aftermarket cooler.

The famous programming blogger Jeff Atwood even recommends taking some temperatures of the inside of the computer, and I can’t argue with him… if the motherboard and CPU are generating so much heat that you can’t touch them, then there’s likely a cooling problem.

Final Status

At this point, you should have a fully working system, and you can start loading all of your software on the machine. Don’t forget to load anti-virus and anti-spyware software before you start downloading random applications.

From the perspective of building the computer, we’re done… but I’m going to add one final article in the series and tell you about my favorite config tweaks that I apply to any new machine, so stay tuned for updates.

For those of you that missed the rest of the series, here you go:

for update join on All Time Solutions

1.Building a New Computer :- 1: Choosing Hardware

2.Building a New Computer – 2: Putting it Together

3.Building a New Computer – 3: Setting it Up

4.Building a New Computer – 4: Installing Windows and Loading Drivers

5.Building a New Computer – 5: Tweaking Your New Computer